
Tools
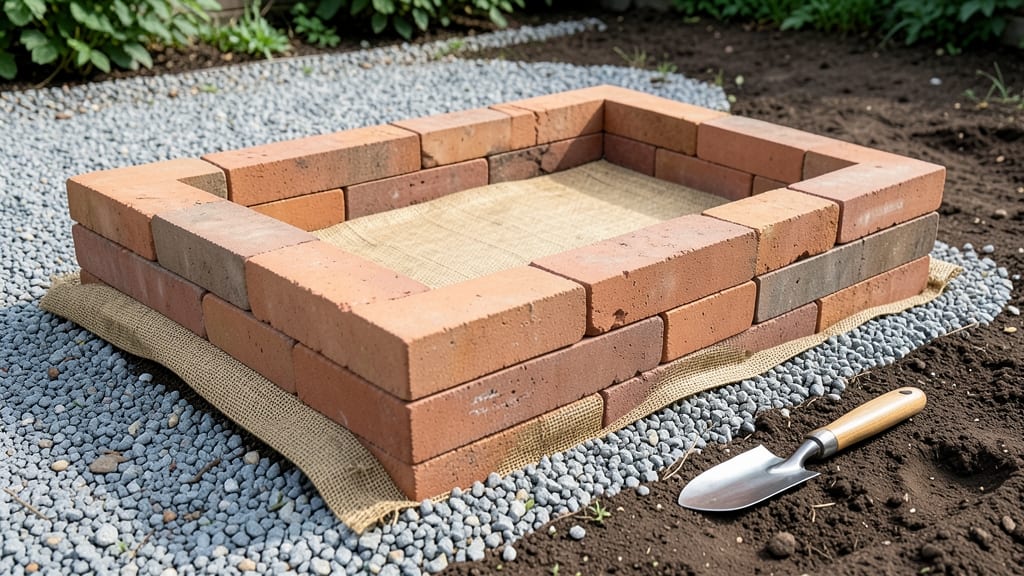
Building a brick raised garden bed without mortar proves you don’t need cement to create something lasting. 🌱 My first attempt wobbled after two seasons—until I discovered the right base and stacking techniques that keep bricks perfectly aligned for years.
The key is in the foundation: a compacted gravel base and interlocking brick patterns that defy wind and root pressure.
You’ll need interlocking bricks (like pavers with lip edges), a tamper, landscape fabric, and 2-3 inches of gravel for drainage. The bed’s height should match your needs—12 inches for most vegetables, 18 for deep-rooted plants.
My 4x8-foot bed now holds tomatoes, peppers, and herbs without a single brick shifting, thanks to these simple structural tricks.
Once built, you’ll fill it with your ideal soil mix and watch plants thrive in a bed that stays level and stable. The best part? No mortar means easy repairs—just swap out a wobbly brick when needed.
We’ll cover how to reinforce corners, add decorative edging, and keep weeds from creeping between bricks.
Perfect for patios, small yards, or urban spaces where weight limits rule out heavy stone. Whether you’re growing flowers or veggies, this method delivers a professional look with beginner-friendly assembly. Let’s get those bricks stacked right!
📚 In This Guide
- What you need
- Instructions
- Tips and common mistakes
- Wrapping up and next steps
What you need
- ● Brick or Block Options: Interlocking pavers (e.g., TimberPress or Borg—20–40 bricks, depending on bed size)
- ● OR standard concrete bricks (8"x8"x16")—20–30 bricks for a 4’x4’ bed (2 courses high)
- ● Landscape Fabric: 1 roll (3’ wide) to prevent weeds and grass from invading
- ● Gravel or Crushed Stone: 10–15 lbs (for drainage and base stability)
- ● Soil Mix: Topsoil: 2–3 cubic feet (for filling the bed)
- ● Compost: 1–2 cubic feet (for nutrient-rich planting)
- ● Tools: Rubber mallet (for gentle brick adjustments)
- ● Level (to ensure even stacking)
- ● Wheelbarrow (for soil/gravel transport)
- ● Garden gloves (because calluses are not cute)
- ● Corner Stakes: 4 wooden stakes (to mark bed dimensions before building)
- ● Landscape Edging: Galvanized metal or plastic (to keep bricks in place)
- ● Waterproof Membrane: 1 sheet (if building near wood or decks)
- ● Decorative Capstones: 4–8 bricks (for a polished finish)
Step-by-step instructions for building a brick raised garden bed without mortar
Here's the method I've used to create sturdy, long-lasting raised beds that won't crumble or shift—no cement required.
🪴 Step 1: Select and Prepare Your Bricks
Choose interlocking bricks (like those used for retaining walls) or soldier bricks (laid flat) for maximum stability. I recommend concrete bricks over clay—they're heavier and won't crack under plant weight. For a 4-foot by 8-foot bed, you'll need about 120 bricks (3 layers of 40 bricks each). Lay them out on a flat, level surface to check for uniformity.
Inspect each brick for cracks or chips before building. A small crack won't ruin the bed, but large breaks can weaken the structure. If using soldier bricks, lay them in a staggered pattern (like brickwork) to distribute weight evenly. This prevents leaning and ensures the walls stay plumb. I like to number the bricks as I go—it makes reassembling them easier if you need to adjust the layout.
🌱 Step 2: Build the Base Layer with Precision
Start by digging a 4-inch deep trench along the perimeter of your bed's footprint. This trench anchors the bricks and prevents shifting. For a 4-foot by 8-foot bed, the trench should be 16 feet long and 4 inches deep. Use a level to ensure the trench is perfectly straight—uneven bases lead to wobbly walls.
Place the first layer of bricks directly into the trench, pressing them 2-3 inches into the soil for stability. Leave a small gap (about ½ inch) between bricks—this allows for drainage and prevents water buildup. If using interlocking bricks, their design naturally creates these gaps. For soldier bricks, use a plastic spacer to maintain even spacing. Check for level after every 4 bricks to avoid crooked walls.
💧 Step 3: Stack Subsequent Layers with Overlapping Joints
Each new layer should overlap the joints below by at least 3 inches. This interlocking pattern mimics brickwork and prevents the walls from bowing outward under soil pressure. For example, if the first brick in the bottom layer starts at the edge of the bed, the first brick in the second layer should start 3 inches inward. This creates a staggered, stable structure.
Use a rubber mallet to gently tap bricks into place—this ensures they sit flush without cracking. Avoid hammering directly on the bricks, as it can cause chips. After every 2 layers, step back and check for plumbness. If a brick feels loose, press it deeper into the soil below or add a small amount of gravel beneath it for extra support. The goal is a bed that feels solid enough to sit on without wobbling.
✂️ Step 4: Reinforce Corners and Edges for Longevity
The corners are the weakest points, so reinforce them by stacking bricks in an L-shape for the first 2 layers. This creates a 3-brick-thick corner that resists outward pressure from the soil. For extra security, I like to stagger the corner bricks so they interlock with the adjacent walls. This is where most beds fail—don't skip this step.
Once the walls reach your desired height (12-18 inches is ideal for most plants), cap the bed with a final layer of bricks laid flat. This prevents soil from spilling over the edges and gives the bed a finished look. If you want to add a decorative border, use landscape pavers or brick edging around the top. Water the bed lightly after building to settle the bricks and check for any shifts.
☀️ Step 5: Fill and Prepare for Planting
Fill the bed with a 12-inch layer of cardboard (to block weeds) topped with 6 inches of compost, followed by 6 inches of high-quality garden soil. Avoid filling the bed all at once—soil settles over time, and overfilling can cause the bricks to shift. Instead, add soil in 2-inch layers, watering lightly between each addition to help it compact naturally.
Let the bed sit for 24 hours before planting. This allows the soil to settle and the bricks to stabilize. If you notice any bricks shifting after filling, press them back into place and add a small amount of gravel beneath them for extra support. Once stable, you're ready to plant. The key to a long-lasting bed is even weight distribution—don't overload one side with heavy plants like tomatoes.
Tips & tricks for perfect brick raised garden beds without mortar
Building a sturdy brick raised bed without mortar is all about precision and smart techniques—here's how to avoid common pitfalls and create a lasting structure.
Brick Selection Matters: While interlocking bricks are ideal, soldier bricks can work too if you're patient. I've found that concrete bricks are the best choice because they're heavier and won't crack under plant weight. For your 4-foot by 8-foot bed, the 120 bricks (3 layers of 40) should be laid out first to check for uniformity—this prevents layout surprises later. If you notice any bricks with large cracks, set them aside for potential use as decorative accents rather than structural elements.
The Foundation is Everything: That 4-inch deep trench isn't just for looks—it's what keeps your bricks from shifting over time. Use a level to ensure it's perfectly straight, and consider adding a 2-inch layer of compacted gravel at the bottom before placing bricks. This creates a stable base that prevents sinking. For extra security, I like to press each brick 2-3 inches into the soil, creating a mechanical lock that holds the structure together without mortar.
Corner Reinforcement Technique: The corners are where most DIY beds fail, so take extra care here. When building the first two layers, create an L-shape at each corner using three bricks—this triple-layer corner resists soil pressure far better than single-brick corners. I also recommend staggering the corner bricks so they interlock with the adjacent walls, creating a continuous support system. After completing these layers, do a quick stability test by gently pushing on each corner—it should feel solid enough to support your weight.
Soil Layering Strategy: The 24-hour settling period before planting is crucial, but how you fill the bed matters just as much. Instead of dumping all the soil at once, add it in 2-inch layers with light watering between each addition. This gradual approach prevents soil from pressing too hard against the brick walls. For the 12-inch cardboard layer, use overlapping sheets to completely block weeds, and consider adding a thin layer of landscape fabric between the cardboard and compost to prevent decomposition from creating gaps over time.
Pro Tips for Brick Raised Garden Bed Without Mortar
- Building a sturdy brick raised bed without mortar is all about precision and smart techniques—here's how to avoid com...
- Brick Selection Matters: While interlocking bricks are ideal, soldier bricks can work too if you're patient. I've fou...
- The Foundation is Everything: That 4-inch deep trench isn't just for looks—it's what keeps your bricks from shifting ...
Frequently asked questions
Got questions about building a sturdy, mortar-free brick garden bed?
You’re not alone! Here are answers to the most common concerns—plus pro tips to keep your project smooth and your plants thriving.
Can I use any bricks for this project?
Not all bricks are created equal! Opt for concrete or cinder blocks (like CMU) for stability—they’re heavy and interlock well. Avoid face bricks (decorative) or clay bricks, as they’re too soft and may crumble over time. If repurposing bricks, ensure they’re clean, dry, and free of cracks to prevent wobbling or erosion.
How long does a mortar-free brick bed last?
With proper materials and stacking, your bed can last 10+ years! The key is using interlocking bricks (like those with lip edges) and securing them with landscape fabric or gravel in the base. Avoid placing it in high-traffic areas where shifting may occur. Regularly check for loose bricks and tighten them with landscape staples or screws if needed.
Will plants grow better in a brick bed without soil?
Nope—brick beds do hold soil, but drainage is key! Line the bottom with cardboard or hardware cloth to block weeds, then add 4–6 inches of gravel before filling with soil. This prevents root rot and keeps moisture balanced. Mix in compost or aged manure to boost fertility, and your plants will thrive just like in traditional beds!
Is this cheaper than a mortar garden bed?
Yes! Skipping mortar saves money on materials and labor, but factor in extra bricks (for stability) and tools like a rubber mallet or level. For a 4’x8’ bed, expect to spend $50–$150 on bricks alone, depending on quality. DIY-ers often save 30–50% compared to hiring a mason for mortar work.
How do I protect my brick bed in winter?
Freeze-thaw cycles can loosen bricks over time. Mulch heavily (4–6 inches) around plants to insulate roots, and avoid letting soil freeze solid. If your bricks shift, re-tighten them in spring with landscape staples. For extra protection, wrap the outer edges with burlap to shield against wind and ice expansion.
What if my bricks start leaning or sinking?
Don’t panic! Loose bricks usually mean uneven base prep or poor interlocking. Dig out the bed, level the ground with gravel, and re-stack bricks tightly. For stubborn shifts, anchor bricks to wooden stakes driven into the ground (hidden under soil). If bricks sink, add more gravel or compact the base before rebuilding.
Wrapping up and next steps
Building a brick raised garden bed without mortar is a game-changer—it’s eco-friendly, budget-friendly, and surprisingly sturdy! 🌱 With just a few materials and a little elbow grease, you’ve unlocked a space to grow thriving plants without the hassle of cement.
Whether you’re a beginner or a seasoned gardener, this method proves that simple solutions often yield the best results.
Now that you’re armed with the know-how, roll up your sleeves and start stacking! Ready to take it further? Try experimenting with different brick patterns or adding a layer of landscape fabric for extra weed control. Happy gardening! 🌿