
Flowers
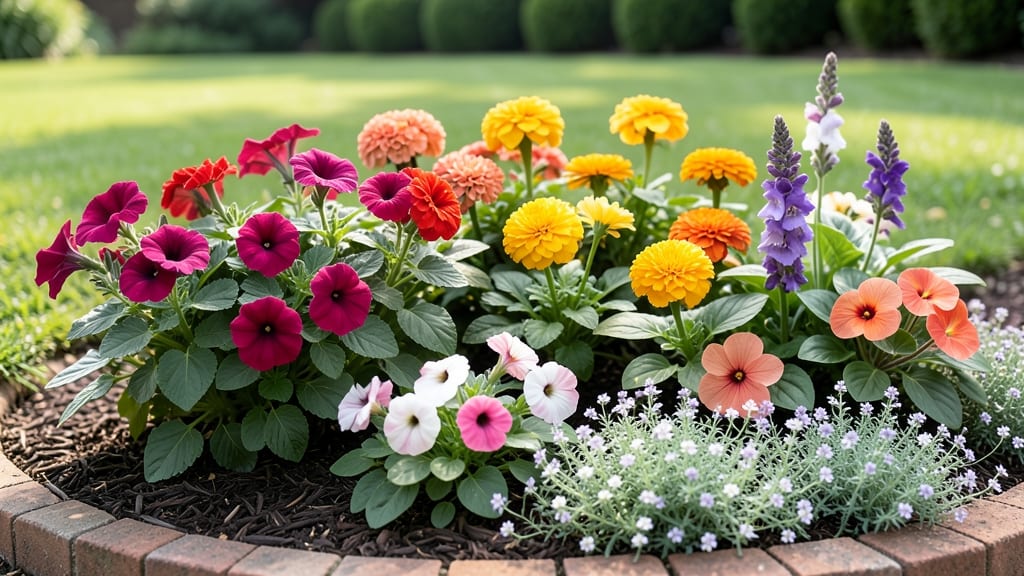
Transforming a small yard into a lush bed flower decoration feels impossible—until you use vertical garden illusions. 🌿 I’ve turned tight spaces into vibrant displays by stacking plants, playing with heights, and letting foliage do the heavy lifting.
The secret? Smart layering that tricks the eye into seeing depth where there isn’t any.
Start with tall, dramatic plants like delphiniums or hollyhocks as your "back row," then add mid-height bloomers like roses or salvias, and fill the front with trailing plants like sweet alyssum or creeping thyme.
The mix of textures—smooth leaves, feathery foliage, and velvety petals—creates the illusion of a much larger space. Even in a 4-by-6-foot bed, this technique makes it feel like a full garden.
By summer, your bed will burst with color and movement, drawing the eye upward and outward. The best part? Maintenance stays simple—just deadhead regularly and water at the base to keep everything thriving. No overcrowding, no wasted space, just pure visual impact.
Works for balconies, narrow side yards, or even container arrangements. The same principles apply whether you’re working with perennials, annuals, or a mix of both. Let’s make that small space shine!
📚 In This Guide
- What you need
- Instructions
- Tips and common mistakes
- Wrapping up and next steps
What you need
- ● Flower bed frame: 1 x pre-made vertical garden panel (e.g., wooden, fabric, or foam core) – size: 4’ x 2’ (adjustable)
- ● OR DIY materials: 2 x wooden planks (1” x 4”) – length: 4’ each
- ● 4 x L-brackets or screws – for sturdy assembly
- ● Growing medium: 1 bag lightweight potting mix (e.g., coco coir + perlite blend) – 1-2 cubic feet
- ○ 1 roll landscape fabric (optional, to prevent soil spills)
- ● Plants: 12-15 trailing or cascading plants (e.g., petunias, ferns, ivy, or succulents)
- ● 1-2 upright accent plants (e.g., small snapdragons or calibrachoa)
- ● Tools: 1 x utility knife (for cutting fabric/foam)
- ● 1 x measuring tape + pencil
- ● 1 x spray bottle (for misting plants)
- ○ 1 x gloves (optional, for handling soil)
- ● 1 x LED string lights (for a magical nighttime glow)
- ● 1-2 miniature figurines (e.g., fairies, mushrooms – scale: 1:12 or smaller)
- ● Paint or chalk: Acrylic paint (for customizing frames) or chalkboard paint (to add whimsical designs)
- ● 1 x self-watering reservoir (e.g., wicking system for low-maintenance care)
Step-by-step instructions for creating vertical flower garden illusions
Transform any small space into a lush floral display with these clever vertical techniques.
🪴 Step 1: Choose Your Vertical Structure
Start by selecting a sturdy vertical surface or frame that matches your space. I like using wooden crates, trellises, or wall-mounted planters because they're lightweight yet durable. For a 4-foot-tall display, a simple wooden ladder wrapped in burlap works perfectly—it adds rustic charm while providing multiple planting levels.
Measure your space first. If you're working with a narrow wall, opt for a 2-foot-wide panel with pockets or pockets. For corners, a triangular freestanding frame creates depth illusion without taking up floor space. Secure any freestanding structures to the wall or ground to prevent tipping—especially important if you'll be adding heavy planters later.
☀️ Step 2: Select Flowers for Layered Visual Impact
Pick flowers with varying heights and textures to create depth. I always include tall spires (like delphiniums or snapdragons), mid-height blooms (petunias or geraniums), and trailing fillers (like sweet potato vine or lobelia). Choose plants that thrive in similar light conditions—most annuals need 6+ hours of sun for continuous blooms.
For a small-space illusion, repeat colors in odd-number groupings (3 or 5 plants per color). This creates visual harmony while making the space feel larger. Avoid overcrowding—leave 4-6 inches between plants so air circulates and stems don't compete for nutrients. If using hanging pockets, limit to one plant per pocket to prevent root competition.
💧 Step 3: Install Irrigation for Effortless Maintenance
Skip the daily watering by installing a drip irrigation system or self-watering pockets. For crates or trellises, I drill small holes in the bottom and run a soaker hose along the back, securing it with zip ties. This delivers water directly to roots without wetting foliage—critical for preventing fungal diseases like powdery mildew.
Test your setup by running water for 10 minutes and checking that every pocket or planting level stays evenly moist. If some areas stay dry, adjust the hose path or add a small watering can as a backup. For wall-mounted displays, consider battery-operated misting systems—they're perfect for delicate flowers like impatiens that dry out quickly in sun.
✂️ Step 4: Arrange for Maximum Visual Drama
Start with your tallest plants at the back or bottom of the structure. This creates a natural focal point that draws the eye upward. For a 3D effect, weave trailing plants through gaps in the structure—let them spill over edges to soften the design. I always place brightest colors in the center and lighter tones on the edges to make the display pop.
Step back frequently to check your arrangement. The goal is to create layers of texture and color that make the space feel lush, not cluttered. If a section looks bare, add foliage plants like coleus or heuchera—their leaves provide instant visual weight. For extra height, tuck bamboo stakes behind tall flowers and tie them to the structure for instant vertical accent.
🌿 Step 5: Maintain for Long-Lasting Beauty
Water early in the morning to give flowers time to dry before evening. Most vertical displays need deep watering every 2-3 days—check by sticking your finger 1 inch into the soil. If it's dry, water thoroughly until you see moisture at the bottom of the structure. For extended blooms, deadhead spent flowers weekly by pinching off faded blooms with your fingers.
Fertilize every 2-3 weeks with a balanced liquid fertilizer (10-10-10 ratio) to keep flowers vibrant. I mix it at half-strength to avoid burning roots—especially important in small containers where roots are crowded. Rotate your display quarter-turn weekly so all sides get even light exposure. This prevents lopsided growth and keeps your vertical garden looking full and symmetrical.
Tips & tricks for perfect vertical flower garden illusions
Here's what nobody tells you about creating stunning vertical floral displays that actually thrive.
Structure Stability: I learned this the hard way after watching a freestanding frame topple during a summer breeze. Always secure your structure to the wall or ground—even if it feels sturdy. For freestanding displays, use heavy-duty brackets or weights at the base. The 4-foot-tall ladder I mentioned? I now add a sandbag at the bottom for extra security. This is especially critical if you're using heavy planters or during windy conditions.
Light Exposure Strategy: Most annuals need 6+ hours of sun, but vertical displays can create tricky shadows. Position your structure so the tallest plants at the back get direct light while the trailing plants at the front receive filtered light. If your space has limited sun, choose shade-tolerant varieties like impatiens or ferns. I rotate my display quarter-turn weekly to ensure even light exposure across all plants—this prevents lopsided growth and keeps the arrangement looking full from every angle.
Irrigation Troubleshooting: That 10-minute test run for your irrigation system is non-negotiable—skipping it means some pockets will dry out while others get soggy. If you notice dry spots after testing, adjust your soaker hose path or add a small watering can as a backup. For wall-mounted displays, battery-operated misting systems work wonders for delicate flowers like impatiens that dry out quickly in sun. Pro tip: Add a thin layer of mulch to your planting pockets to help retain moisture between waterings.
Color Arrangement Secret: The odd-number grouping rule (3 or 5 plants per color) isn't just about aesthetics—it creates visual harmony that makes small spaces feel larger. For maximum impact, place your brightest colors in the center where they'll draw the eye. I always arrange my trailing plants to spill over edges in lighter tones, which creates that "softened" look that makes the display feel intentional rather than cluttered. This technique works particularly well in narrow spaces where you want to create depth illusion.
Pro Tips for Bed Flower Decoration
- Here's what nobody tells you about creating stunning vertical floral displays that actually thrive.
- Structure Stability: I learned this the hard way after watching a freestanding frame topple during a summer breeze. A...
- Light Exposure Strategy: Most annuals need 6+ hours of sun, but vertical displays can create tricky shadows. Position...
Frequently asked questions
Got questions about transforming your bed into a stunning flower display? Here are some answers to help you get started with bed flower decoration—whether you're a beginner or looking for pro tips!
What’s the best type of flowers for a bed flower decoration?
Choose durable, vibrant flowers like petunias, geraniums, or marigolds for long-lasting color. For vertical illusions, opt for trailing plants like ivy or nasturtiums. If you’re using artificial flowers, pick waterproof, UV-resistant materials to prevent fading.
How long does a bed flower decoration typically last?
Real flowers last 1-3 weeks, depending on care (watering, sunlight). Artificial flowers can last years if stored properly. For seasonal displays, plan ahead—spring/summer blooms fade faster than hardy perennials.
Can I reuse bed flower decorations year after year?
Artificial flowers are reusable—just store them in a dry, shaded spot. For real flowers, dry or compost them after use. Pro tip: Preserve dried flowers in silica gel or hang them upside down to extend their life!
What’s the easiest way to create a vertical flower bed illusion?
Use trellises, hanging planters, or tiered shelves to stack flowers at different heights. For a budget-friendly look, attach faux flowers to foam boards or wire frames and lean them against walls. Start small—even a single vertical planter makes a bold statement!
How do I keep pests away from my flower bed decoration?
Prevent pests with neem oil sprays or companion planting (e.g., marigolds repel bugs). For artificial flowers, ensure they’re dust-free—pests avoid clean surfaces! If using real flowers, check for aphids or spider mites weekly and remove affected leaves.
Can I mix real and artificial flowers in one bed?
Yes! Combine them for a low-maintenance yet lush look. Place artificial flowers in high-traffic areas (like centerpieces) and real ones in sun-drenched spots. Just ensure artificial flowers are weather-resistant to avoid mold or mildew.
Wrapping up and next steps
Transforming your small space into a lush, green retreat is easier—and more magical—than you think! With a few simple materials and a touch of creativity, bed flower decorations can bring nature indoors, adding life, color, and a sense of tranquility to any room.
Whether you’re a gardening novice or a seasoned plant lover, this vertical garden illusion is a game-changer for maximizing beauty in tight spaces. 🌿✨
Now that you’re inspired, why not start small? Pick a corner, gather your supplies, and let your imagination bloom! Your dream cozy nook is just a few vines away—happy decorating!