
Flowers
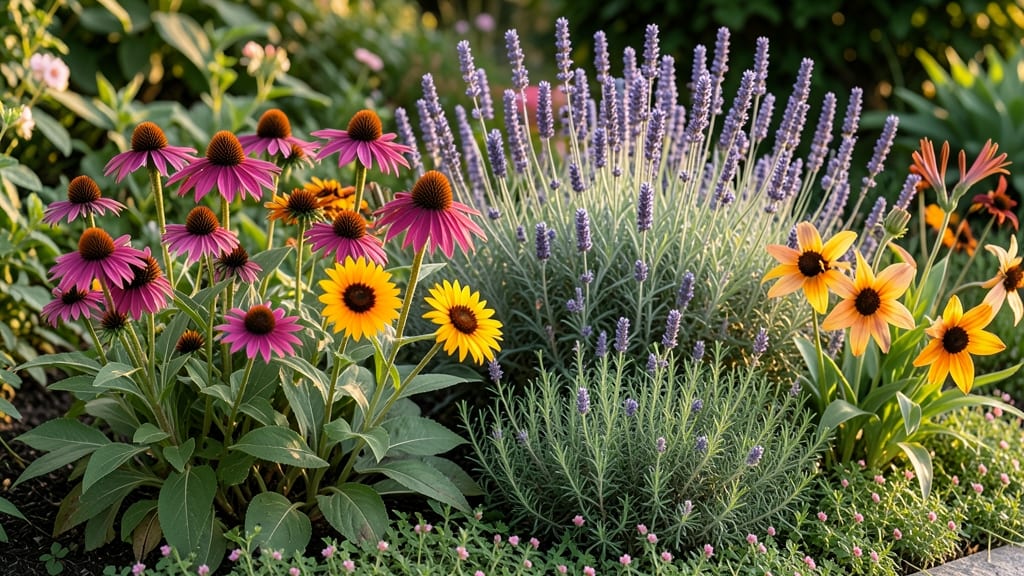
Your backyard flower bed designs could transform from a flat, forgettable patch into a year-round showstopper with just a few strategic layers. ✨ The secret isn't more plants—it's arranging them so each season reveals something new, from early spring bulbs to late-fall berries, all while creating that "wow" vertical impact.
Start with a 3-tier height structure: tall back (like coneflowers or hollyhocks), mid-height (black-eyed Susans or Russian sage), and low front (creeping thyme or ajuga).
This isn't just pretty—it solves common problems too: the tallest plants hide the bed's edges, mid-heights catch your eye at a distance, and low growers prevent weeds from stealing the show.
You'll end up with a garden that looks different every month—purple in May, gold in July, and fiery red in October—while still feeling intentional, not chaotic. The best part? You can mix perennials (low-maintenance) with annuals (seasonal pops) for that "I planned this" effect without the yearly replanting.
Works for any yard size, from a 3x6-foot rectangle to a curving border along your patio. Let's make your flower bed the neighborhood's quietest brag-worthy feature.
📚 In This Guide
- What you need
- Instructions
- Tips and common mistakes
- Wrapping up and next steps
What you need
- ● Topsoil or garden soil: 2–3 cubic yards (depending on bed size; aim for well-draining, nutrient-rich soil).
- ● Compost or organic matter: 1–2 bags (to enrich soil and retain moisture).
- ● Mulch: 2–3 bags (shredded bark or pine straw; 3–4 inches deep for weed suppression).
- ● Plants: Tall/structural plants (back layer): 3–5 peryds (e.g., Delphinium, Joe Pye Weed, or ornamental grasses).
- ● Mid-height fillers: 5–7 peryds (e.g., Black-Eyed Susans, Coneflowers, or Salvia).
- ● Low-growing/spillers: 7–10 peryds (e.g., Creeping Thyme, Ajuga, or Petunias).
- ● Seasonal accents: 3–5 peryds (e.g., Spring bulbs, Fall Mums, or Winter Pansies).
- ● Garden shovel or spade (for digging and soil prep).
- ● Garden rake (to level soil and remove debris).
- ● Wheelbarrow or garden cart (for hauling soil/mulch).
- ● Measuring tape (to mark bed dimensions).
- ● Gloves & knee pads (for comfort and protection).
- ● Watering can or hose with spray nozzle (for post-planting hydration).
- ● Edging tools (metal or plastic; to define bed borders neatly).
- ● Landscape fabric (if planting in high-weed areas; cut holes for plants).
- ● Decorative stones or pavers (for pathways or borders).
- ● Slow-release fertilizer (granular or spikes; follow package rates).
- ● Plant markers (to track varieties and rotations).
Instructions for creating bold, seasonal flower bed transitions
Layered heights and strategic plant choices create drama—here's how to design beds that shift with each season.
🌱 Step 1: Map Your Sunlight Zones First
Before selecting plants, map your yard into 4-6 distinct sunlight zones based on morning, afternoon, and dappled light patterns. I use colored flags to mark each area—full sun gets red, part shade gets blue, and full shade gets green. This ensures every plant thrives where it's placed.
Measure each zone's width and depth to determine how many 3-foot diameter plant clusters will fit. Sketch a rough layout on graph paper, using each square to represent a 12-inch plant spacing. This prevents overcrowding and lets you visualize seasonal transitions before digging.
🌿 Step 2: Build the Foundation with Structural Plants
Start with 3-4 tall, long-lived perennials as your backbone—think 9-foot tall garden phlox or 5-foot bee balm for summer height, then add 4-foot tall hellebores for winter structure. These anchor your design and create the layered heights that make transitions dramatic.
Plant these in a staggered arrangement, spacing them 18-24 inches apart to allow air circulation. I like to sink them slightly deeper than their nursery pots—about 1 inch deeper than the root ball—to stabilize them in windy spots. Water immediately after planting to settle the soil around roots.
☀️ Step 3: Layer Seasonal Fillers in Three Height Tiers
Divide remaining plants into three tiers: tall (2-3 feet), medium (1-2 feet), and low (under 1 foot). For spring, I use bleeding hearts (2 feet) and lungwort (1 foot), then swap in black-eyed Susans (3 feet) and Russian sage (4 feet) for summer. This creates visual movement as seasons change.
Plant in odd-numbered groupings—3 or 5 plants per cluster—to avoid symmetrical stiffness. Space medium-height plants 12-18 inches apart and low growers 8-12 inches apart. I always leave 6-inch gaps between tiers to prevent shading issues and make maintenance easier.
✂️ Step 4: Add Seasonal Accents and Mulch
Select 2-3 annuals per season to fill gaps—pansies in spring, zinnias in summer, and ornamental kale in fall. These provide instant color shifts. Plant them in the front of each tier, where they'll get the most visibility and can be replaced annually without disturbing perennials.
Spread 3 inches of mulch over the entire bed, keeping it 2 inches away from plant stems to prevent rot. I use shredded bark mulch because it breaks down slowly and improves soil structure over time. This also suppresses weeds and maintains moisture levels for your layered plants.
🪴 Step 5: Install Seasonal Transition Markers
Place 3-4 decorative stakes or small signs at key transition points—where tall plants meet medium, or where summer blooms give way to fall foliage. I label mine with the plant names and their peak bloom times so I can swap them out easily when seasons change.
For extra drama, add 1-2 ornamental grasses in contrasting textures—feathery maiden grass (4 feet) next to bold fountain grass (3 feet). These provide year-round structure and fill gaps when perennials are dormant. Water deeply after planting to help roots establish in their new layered arrangement.
Tips & tricks for stunning seasonal flower bed designs
These little details will transform your flower beds from ordinary to showstopping year-round.
Sunlight Mapping Secret: I can't stress enough how critical Step 1 is—those colored flags aren't just decoration. Use them to track how sunlight moves across your yard throughout the day. Morning sun behaves differently than afternoon sun, and dappled light creates entirely different microclimates. I've seen clients ruin perfectly healthy plants by placing sun-lovers in shade zones. Trust me, the 15 minutes you spend mapping now will save hours of replanting later.
Root Depth Matters: When planting your structural perennials in Step 2, that extra inch of depth makes all the difference—especially for wind-prone areas. I learned this the hard way when my 9-foot garden phlox nearly toppled in a spring storm. The deeper you plant, the better the root system anchors itself. This is particularly important for heavy clay soils where roots need extra stability to reach moisture.
Odd Numbers Create Flow: The odd-numbered groupings in Step 3 aren't just a design trick—they create visual rhythm. Three plants form a natural triangle, while five creates a more dynamic curve. This principle applies to all your tiers. I always sketch my groupings first on paper, moving plants around until the arrangement feels balanced but not symmetrical. Think of it as the visual equivalent of good music—there should be a beat that guides the eye.
Mulch Application Technique: That 3-inch layer of mulch in Step 4 isn't just about weed control—it's about creating the perfect microclimate for your plants. Keep it 2 inches away from stems to prevent rot, but don't be afraid to mound it slightly higher around established perennials. This creates a thermal blanket that protects roots from temperature swings. I've seen beds where mulch was piled too close to stems, causing crown rot in otherwise healthy plants.
Pro Tips for Backyard Flower Bed Designs
- These little details will transform your flower beds from ordinary to showstopping year-round.
- Sunlight Mapping Secret: I can't stress enough how critical Step 1 is—those colored flags aren't just decoration. Use...
- Root Depth Matters: When planting your structural perennials in Step 2, that extra inch of depth makes all the differ...
Frequently asked questions
Got questions about transforming your backyard with stunning flower bed designs? Here are some of the most common queries—and their answers—to help you create a showstopping seasonal display!
What’s the best time of year to plant a layered flower bed?
The ideal time depends on your climate! In most regions, early spring (after the last frost) or early fall (6-8 weeks before first frost) are perfect for planting perennials and bulbs. Annuals can go in until mid-summer for continuous blooms. Pro tip: Check your local frost dates to avoid shocking tender plants!
How can I design a layered flower bed on a budget?
Start with thrifted containers or repurposed materials (like old wooden pallets or bricks) for borders. Use native plants—they’re low-maintenance and often cheaper. Swap expensive mulch for grass clippings or shredded leaves, and shop sales at garden centers. Prioritize perennials over annuals for long-term savings!
How do I keep pests and weeds from ruining my flower bed?
Prevent pests with healthy soil (rich in compost) and neem oil sprays. Mulch heavily (3-4 inches) to smother weeds. Plant pest-repelling companions like marigolds (for aphids) or lavender (for mosquitoes). Hand-pull weeds regularly—they’re easier to remove when young!
Can I mix perennials and annuals in the same flower bed?
Annuals (like petunias or zinnias) add colorful pops, while perennials (like coneflowers or hostas) provide structure and longevity. Place annuals in the front for quick impact, and tuck perennials toward the back. Just ensure annuals get enough water—they often dry out faster!
What do I do if my flower bed looks dull mid-season?
Revitalize with deadheading (snipping spent blooms) to encourage new growth. Add fast-growing annuals (like cosmos or sunflowers) for instant color. Rotate containers with seasonal picks (e.g., pansies in winter, geraniums in summer). A fresh layer of mulch can also hide soil tiredness and boost moisture retention!
Wrapping up and next steps
Transforming your backyard with bold, seasonal flower bed designs is all about embracing creativity and layering heights for stunning visual impact. Whether you’re drawn to vibrant perennials, fragrant annuals, or textured foliage, the key is to play with contrast, color, and structure—while keeping maintenance in mind. 🌸
Now that you’re inspired, take the next step: sketch a rough layout, gather your materials, and start small with one bed or container. Every garden evolves, so don’t stress over perfection—just enjoy the process and watch your outdoor space bloom into a masterpiece!