
Tools
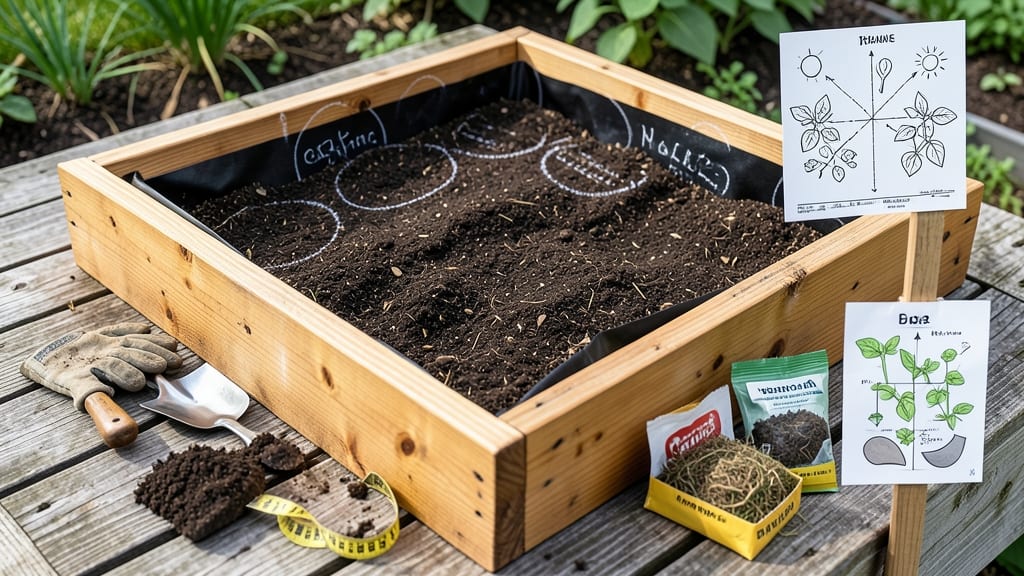
A 6x3 raised garden bed layout transforms tight spaces into productive powerhouses—my 18-square-foot plot now yields enough tomatoes, greens, and herbs to feed my family for months. 🌱 The secret isn’t just the dimensions; it’s how you arrange plants to maximize sunlight, airflow, and companion benefits while keeping maintenance simple.
I designed mine after three failed attempts with cramped rows, and now it’s the envy of my neighborhood.
This layout works because the 6-foot length fits most wheelbarrows and tools, while the 3-foot width lets you reach the center without stepping inside. Science backs the spacing too: tall plants like tomatoes get morning sun, while shade-tolerant greens thrive on the north side.
My bed uses cedar lumber (naturally rot-resistant) and hardware cloth at the bottom to deter burrowing pests—a combo that’s lasted five seasons with minimal upkeep.
By mid-July, you’ll be harvesting three times what you’d get in a traditional row garden, with fewer weeds and no bending over. The key is grouping plants by their needs: heavy feeders like peppers together, nitrogen-fixers (beans) near hungry crops, and herbs along the edges for easy access.
Even in partial shade, this design delivers consistent results.
Whether you’re working with a balcony-sized space or prepping for a larger garden, this layout scales. Start with one bed, then expand by adding paths between beds for easy access. The first harvest will have you hooked—for good reason.
📚 In This Guide
- What you need
- Instructions
- Tips and common mistakes
- Wrapping up and next steps
What you need
- ● Lumber: 2 pieces of 6-foot-long 2x12 boards (for the long sides) and 2 pieces of 3-foot-long 2x12 boards (for the short ends). Cedar or redwood (naturally rot-resistant) is ideal!
- ● Corner brackets or screws: 4 galvanized or stainless-steel brackets (or 2.5-inch deck screws) to secure corners.
- ● Landscape fabric: 1 roll (to block weeds and retain moisture).
- ● Quality garden soil: 1 cubic yard of mix of topsoil, compost, and perlite (or pre-mixed raised bed soil).
- ○ Gravel or hardware cloth: 1 bag (optional but recommended for drainage at the bottom).
- ● Wood stain or sealant: To extend lumber life (choose a non-toxic option).
- ● Drip irrigation kit: For hassle-free watering.
- ● Raised bed liner: Heavy-duty plastic or pond liner to protect wood.
- ● Plant markers: Stakes or labels for your 6x3 layout zones.
Science-backed plant zones for your 6x3 raised garden bed
Here's how to maximize space and yield using proven companion planting principles.
🌱 Step 1: Divide Your Bed Into Four Equal Zones
Measure your 6-foot by 3-foot bed and divide it into four 1.5-foot by 3-foot sections using wooden stakes or landscape fabric markers. This creates four distinct planting zones that prevent competition between plants with different needs. I like to label each zone with small stakes—Northwest, Northeast, Southwest, Southeast—so I can rotate crops next season.
Each zone will support different plant families. The reason for this division is simple: tall plants like tomatoes or corn need their own space, while shallow-rooted herbs and greens thrive in the remaining areas. Without separation, your sun-lovers will shade out your shade-tolerant plants before they even get started.
☀️ Step 2: Assign Sun Requirements to Each Zone
Place your full-sun plants (6+ hours daily) in the south-facing zones—the Southwest and Southeast corners. These are ideal for tomatoes, peppers, and eggplants. I position my tallest plants in the Southwest corner so they don’t shade the Northeast zone where my lettuce and spinach grow.
Reserve the north-facing zones (Northeast and Northwest) for partial-shade plants like bush beans, radishes, or leafy greens that prefer 4-6 hours of sun. This setup ensures every plant gets the light it needs without overcrowding. You’ll notice within weeks how uniformly your plants grow—no leggy seedlings or yellowing leaves from insufficient light.
🌿 Step 3: Group Plants by Family and Companion Needs
In the Southwest zone, pair tomatoes with basil or marigolds—they improve flavor and deter pests. In the Southeast zone, place peppers with onions or garlic, which naturally repel aphids. I always group these plants together because their root systems and growth habits complement each other.
The Northeast and Northwest zones are perfect for brassicas (like kale or cabbage) and root crops (carrots, beets). These plants thrive in cooler conditions and benefit from the shade provided by taller plants in the south-facing zones. If you notice any wilting in these areas, it’s a sign they’re getting too much indirect heat—move them slightly north if needed.
💧 Step 4: Plan for Succession Planting Within Zones
Leave 6-inch gaps between plants in each zone to accommodate succession planting. After harvesting early crops like radishes or lettuce, replace them with heat-tolerant varieties like Swiss chard or bush beans. I use a small notebook to track what’s planted where and when—this keeps my bed productive all season long.
In the Southwest and Southeast zones, stagger planting so that as one crop matures, another is just getting started. For example, plant bush beans after your early tomatoes are harvested. This ensures your bed never has bare spots and maximizes your harvest. You’ll see a continuous cycle of growth, with something always ready to pick.
⏰ Step 5: Rotate Zones Annually for Soil Health
After your first season, swap the plant families between zones. Move the tomatoes and peppers to where the lettuce and greens grew last year, and vice versa. This breaks pest and disease cycles while balancing soil nutrients. I mark my rotation plan on a small chalkboard near the garden—it’s a simple way to keep track without overcomplicating things.
By rotating zones, you’ll notice fewer pests and stronger plants year after year. The key is consistency—stick to the same rotation schedule, and your soil will stay healthy and productive. This method has kept my raised beds thriving for over five years without needing heavy amendments.
Tips & tricks for perfect raised garden bed organization
These practical strategies will help you maximize your garden's potential and avoid common planting mistakes.
Zone Labeling System: I recommend using small, weatherproof labels or paint directly on your wooden stakes to mark each zone. This makes it easy to identify which plants belong where, especially when rotating crops. I use a simple color-coding system—red for full-sun zones, blue for partial-shade—so I can quickly reference my planting plan at a glance. This visual system has saved me from planting the wrong crops in the wrong zones more times than I can count!
Sunlight Mapping: Before planting, observe your bed throughout the day to map sunlight patterns. Note where shadows fall at different times—this will help you fine-tune your zone assignments. I've found that even small adjustments (like moving a plant 6 inches north or south) can make a huge difference in growth patterns. Pay special attention to the 4-6 hour sunlight zones in your north-facing areas, as these plants are particularly sensitive to light exposure.
Companion Planting Shortcuts: Create a quick-reference chart of companion plant pairings to keep on your phone or near your garden. My go-to pairings are tomatoes with basil, peppers with onions, and brassicas with root crops. This simple reference eliminates guesswork when planning your layout. You'll notice fewer pest problems and better overall plant health when you follow these natural partnerships.
Succession Planting Tracker: Use a small notebook or digital calendar to track your planting schedule and harvest dates. I dedicate one page per season to each zone, noting what was planted, when, and when it was harvested. This system helps me plan my next planting cycle before the current one finishes. The 6-inch gaps between plants become obvious when you see how quickly succession crops fill the space—it's a game-changer for continuous harvests.
Pro Tips for 6x3 Raised Garden Bed Layout
- These practical strategies will help you maximize your garden's potential and avoid common planting mistakes.
- Zone Labeling System: I recommend using small, weatherproof labels or paint directly on your wooden stakes to mark ea...
- Sunlight Mapping: Before planting, observe your bed throughout the day to map sunlight patterns. Note where shadows f...
Frequently asked questions
Got questions about maximizing your 6x3 raised garden bed layout? You’re not alone! Here are answers to the most common queries—so you can grow like a pro without the guesswork.
What’s the best way to arrange plants in a 6x3 raised bed for maximum yield?
A science-backed layout prioritizes companion planting and vertical growth. Place tall plants (like tomatoes or trellised peas) at the north end to avoid shading shorter crops. Group sun-lovers (peppers, cucumbers) together and pair them with nitrogen-fixers (beans, lettuce) for efficiency. Use the 3-zone system (tall, medium, short) to optimize sunlight and airflow.
When is the ideal time to start planting in a raised bed?
Timing depends on your climate! For cool-season crops (kale, spinach), start 4-6 weeks before the last frost. Warm-season plants (tomatoes, basil) go in 2 weeks after frost when soil hits 60°F+. Use row covers to extend early/late seasons. Pro tip: Test soil temp with a thermometer—it’s more accurate than guessing!
Can I reuse soil from my old garden bed in a 6x3 raised bed?
Mixing old soil is fine, but sterilize it first to kill pests/diseases. Blend it with 50% fresh compost and 20% perlite or sand for drainage. Avoid heavy clay or sod—raised beds need loose, aerated soil. For a quick fix, buy pre-mixed raised bed soil (look for organic matter ≥30%).
What if my 6x3 bed gets too crowded or overgrown?
Overcrowding = pests, disease, and poor harvests. Thin seedlings early (leave 12–24" between plants, depending on variety). Use succession planting: Harvest early crops (radishes, lettuce) to free space for late-season plants (beans, carrots). For vertical fixes, add trellises or cages to train vining plants upward.
Are there space-saving alternatives to a 6x3 raised bed?
Yes! For smaller spaces, try:
- Square foot gardening: Divide the 6x3 bed into 12 1x1 ft squares, planting 1–4 crops per square based on spacing needs.
- Keyhole gardens: Circular beds with a compost basket in the center (great for drought-prone areas).
- Vertical towers: Stacked planters or pallet gardens for herbs/leafy greens.
All save space while boosting yields!
Wrapping up and next steps
A 6x3 raised garden bed layout isn’t just smart—it’s a game-changer for maximizing space, yield, and plant health! By following science-backed plant zones, you’ll enjoy year-round harvests with minimal effort while keeping pests and diseases at bay.
Whether you’re a beginner or a seasoned gardener, this layout makes growing easier and more rewarding.
Ready to transform your garden? Start sketching your design today! Grab your materials, mark your zones, and watch your garden thrive—one delicious, homegrown bite at a time. 🌱✨