
Tools
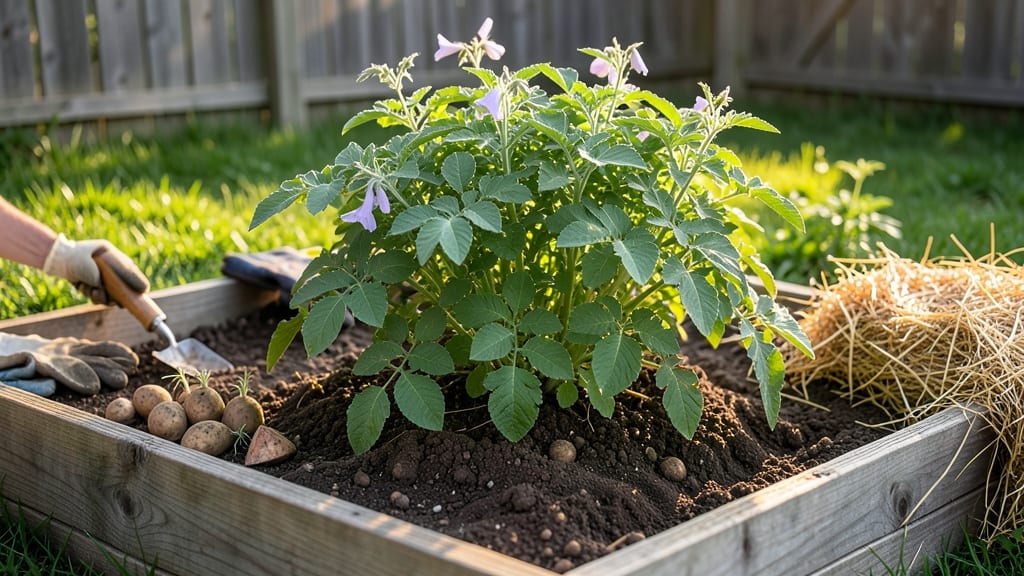
Planting potatoes in raised beds turns a 4x8-foot space into a high-yielding harvest factory. 🌱 I learned the hard way that regular garden soil leads to rot—raised beds solve drainage and warmth issues perfectly.
The secret? Loose, well-draining soil and a few simple adjustments that keep tubers from turning to mush.
Start with a 12-inch-deep bed filled with a mix of compost, straw, and coarse sand. Plant seed potatoes 4-6 inches apart, 4 inches deep, with eyes facing up. The magic happens when you hill soil around stems as they grow—this prevents greening and encourages more tubers.
Most people skip this step, and that’s why their harvests disappoint.
By midsummer, you’ll be harvesting baby potatoes straight from the soil, and the full crop in 90-120 days. The raised bed keeps pests like wireworms at bay, and companion plants like thyme or marigolds deter Colorado potato beetles. Just watch for blight—remove affected leaves immediately and avoid overhead watering.
This method works in spring or fall plantings, even in cooler zones. The raised bed’s warmth extends the season, so you can grow potatoes when ground gardens freeze. Start small—just 5-10 plants—and you’ll never buy store-bought spuds again.
📚 In This Guide
- What you need
- Instructions
- Tips and common mistakes
- Wrapping up and next steps
What you need
- ● Raised bed garden: Minimum 4’ x 8’ (or larger for bigger yields). Ensure it’s at least 12” deep (deeper = more space for potato growth!).
- ● Potato seeds: Seed potatoes (not grocery-store spuds!)—choose disease-resistant varieties like Yukon Gold, Red Pontiac, or Fingerlings. Buy 3–5 lbs per 100 sq ft.
- ● High-quality soil: Mix 60% compost (well-aged, no manure) + 40% garden soil. Avoid fresh manure—it can burn potato eyes!
- ● Organic fertilizer: 5-10-10 or 10-10-10 (balanced NPK) or composted chicken manure (1 lb per 10 sq ft).
- ● Mulch: Straw or grass clippings (4–6 inches thick) to retain moisture and suppress weeds.
- ● Garden tools: Hand trowel or transplanting spade
- ● Pruners or sharp knife (for cutting seed potatoes)
- ● Garden hose with spray nozzle or watering can
- ● Soil test kit: Check pH (ideal: 5.0–6.5). Adjust with lime or sulfur if needed.
- ● Row covers: Lightweight fabric to protect from pests or frost (especially in early/late seasons).
- ● Potato clipper: For harvesting without damaging tubers.
- ● Drip irrigation system: Saves time and ensures consistent moisture.
- ● Plant markers: Label varieties if growing multiple types.
How to plant potatoes in raised beds for maximum yield
Here's the straightforward method I use to grow potatoes in raised beds—no digging, no fuss, just consistent harvests.
🌱 Step 1: Choose the Right Potatoes and Prep the Raised Bed
Start with seed potatoes (not grocery store spuds—they're treated to prevent sprouting). Cut larger ones into chunks with at least one or two eyes (the little dimples) per piece, then let them cure for 24 hours to form a callous. This prevents rot when planted.
Fill your raised bed with loose, well-draining soil—a mix of garden soil, compost, and a handful of aged manure per cubic foot works perfectly. The bed should be at least 12 inches deep to accommodate potato growth. I like to add a 2-inch layer of straw or grass clippings at the bottom to improve drainage and reduce compaction.
🪴 Step 2: Plant Seed Potatoes in Rows with Proper Spacing
Arrange the seed potatoes in rows, spacing them 12 inches apart in each direction. Place them 4 inches deep—deeper planting prevents early sprouting and protects against frost. Cover them lightly with soil, leaving just the top exposed so you can see where they are.
Here's the thing—potatoes grow best in loose soil. After planting, add a 2-inch layer of straw or grass clippings on top. This mulch keeps the soil moist, suppresses weeds, and gives you a visual cue for when to add more soil (more on that later). Water gently but thoroughly until the soil feels damp 6 inches down.
☀️ Step 3: Hill Soil Gradually as Plants Grow
When the potato plants reach 6 inches tall, it's time to hill. Gently mound soil or compost around the stems, covering about half their height. This encourages more tuber formation underground. Repeat this process every 2-3 weeks until the plants flower—you'll know it's time when you see those pretty purple or white blooms.
Don't skip hilling! It's what gives you those big, bountiful potatoes. Just make sure to keep the soil loose and well-draining. If you notice the plants wilting, water deeply but avoid soggy soil—potatoes rot faster than they grow in waterlogged conditions.
💧 Step 4: Water and Fertilize for Consistent Growth
Keep the soil consistently moist but never soggy. Water deeply once a week (or more often in hot weather) until the top 6 inches of soil feel damp. I like to use a soaker hose or drip irrigation to avoid disturbing the soil and encouraging disease.
Feed the plants lightly with a balanced, organic fertilizer (like 5-5-5) when they're about 6 inches tall. Too much nitrogen makes the plants grow lush tops but few potatoes. Instead, focus on a steady supply of phosphorus and potassium to boost tuber development. Stop fertilizing once the plants flower.
⏰ Step 5: Harvest at the Right Time for Best Flavor
New potatoes are ready to harvest about 2 weeks after flowering. Gently dig around the base of a plant and pull up a few potatoes to check their size—if they're golf-ball sized, they're perfect for eating fresh. For full-sized potatoes, wait until the plant's foliage yellows and dies back completely.
Harvest on a dry day to prevent soil from sticking to the potatoes. Shake off excess dirt and cure them in a dark, cool place for 24 hours before storing. This helps toughen their skins and extends their shelf life. Store in a cool, dark place with good airflow—like a root cellar or even a cardboard box in your garage.
Tips & tricks for planting potatoes in raised beds
These simple strategies will help you avoid common mistakes and maximize your potato harvest in raised beds.
Seed Potato Prep: When cutting your seed potatoes, make sure each piece has at least two eyes—this ensures strong root development. I learned the hard way that single-eye pieces often produce small, underdeveloped potatoes. After cutting, let them cure on a paper towel for the full 24 hours before planting. This callusing step is crucial for preventing rot in the soil.
Soil Depth Matters: The 12-inch depth requirement isn't just about space—it's about creating the perfect environment for tuber development. I've seen gardeners struggle with shallow beds that limit potato growth. Use a ruler to verify depth before planting, and consider adding a 2-inch layer of compost at the bottom to give your potatoes extra room to expand as they grow.
Hilling Technique: When your plants reach 6 inches tall, don't just mound soil randomly—create gentle slopes around the stems rather than steep piles. This gradual approach prevents soil compaction and allows water to penetrate more effectively. I've found that adding a handful of compost to each hilling helps maintain loose, aerated soil that potatoes love.
Watering Wisdom: The "damp 6 inches" test is your best friend, but here's what nobody tells you: water in the morning so the soil has all day to dry slightly before evening. This prevents fungal diseases that thrive in constantly wet conditions. I've had better success with drip irrigation than overhead watering—it keeps the leaves dry and reduces disease risk.
Pro Tips for Planting Potatoes In Raised Bed Garden
- These simple strategies will help you avoid common mistakes and maximize your potato harvest in raised beds.
- Seed Potato Prep: When cutting your seed potatoes, make sure each piece has at least two eyes—this ensures strong roo...
- Soil Depth Matters: The 12-inch depth requirement isn't just about space—it's about creating the perfect environment ...
Frequently asked questions
Got questions about growing potatoes in raised beds?
You’re not alone! Here are answers to the most common queries—from timing to troubleshooting—to help you grow a bountiful harvest with confidence.
When is the best time to plant potatoes in a raised bed?
Plant potato seeds (or seed potatoes) as soon as the soil warms to 40–50°F (4–10°C) in spring, typically 2–4 weeks before your last frost date. For year-round harvests, you can also plant fingerling or early varieties in late summer for a fall crop—just ensure they mature before winter sets in!
How long does it take for potatoes to grow in a raised bed?
Most varieties take 90–120 days to mature, but early potatoes can be ready in as little as 60 days. Check your seed packet for specific timelines—raised beds often speed up growth due to better drainage and warmth. Harvest when the foliage yellows and dies back for the best flavor!
Can I plant potatoes in a raised bed if I don’t have seed potatoes?
Use certified disease-free seed potatoes from garden centers, or try organic sprouted potatoes from your grocery store (cut into chunks with at least one "eye," let them dry for a day, then plant). Avoid grocery-store potatoes labeled "new" or treated to prevent sprouting—they won’t grow well!
What should I do if my potato plants get pests or diseases?
Common issues include colorado potato beetles, blight, or wireworms. For beetles, handpick adults and larvae. Prevent blight by avoiding overhead watering and choosing resistant varieties like Red LaSoda. If wireworms are a problem, add compost or aged manure to deter them. Rotate crops yearly to break disease cycles!
Can I grow potatoes in a raised bed with other vegetables?
Yes! Potatoes thrive with companion plants like beans, cabbage, or corn (they deter pests). Avoid planting them near tomatoes, peppers, or eggplants—they’re in the same family and can spread diseases. In raised beds, keep potatoes 12+ inches apart and use hill soil around stems to prevent competition for nutrients.
Wrapping up and next steps
Planting potatoes in a raised bed garden is a rewarding way to grow a bountiful harvest with minimal space! 🌱 Whether you're a beginner or a seasoned gardener, this method simplifies care while maximizing yields. Start small, experiment with varieties, and soon you’ll enjoy fresh, homegrown potatoes year-round.
Ready to dig in? Your next step: Grab your supplies, sketch a simple raised bed plan, and mark your calendar for planting—spring or fall, whichever suits your climate. Happy gardening! 🌟